Getting Started with Pygame
This is a post in the
pygame series.
Other posts in this series:
- Jun 10, 2025 - Getting Started with Pygame
- Jun 11, 2025 - Basic Movement
This tutorial is for the beginner, the ‘PyGame Worm’ lessons are intermediate at a rough guess. IDK, those terms were never well defined when I started programming.
We dont teach the absolute basics of python here. You need to have a very basic understanding before you start these tutorials else you will be lost.
The style used here is code as we need, not the best method but a good way to try things out if you keep your changes small. We don’t use tests as that will distract from the lesson, but that will be taught soon.
Python relies heavily on indentation to correctly group blocks of code, but it doesn’t really care about space between lines of code.
Variables are mostly declared during first use by simple assignment.
We don’t go much deeper than that, so if you see a better way of doing things, good, but don’t email me, ok!
Using Python and Pygame to make games
-
download python from python.org and install
select the OS and architecture - desktops/laptops for windows are usually windows-amd64 Let it set environment variables if it asks and also to remove path length limits you likely need to reboot (You can also set up virtual environments but this tutorial doesn’t cover that)
-
Install Pygame
pygame.org gives instructions, though I find the following to work well Go into the folder you want to use for Python development and run terminal or cmd from there. (right click in the folder in windows and select “run terminal in folder”)
type in the following
python -m pip install -U pygame
-
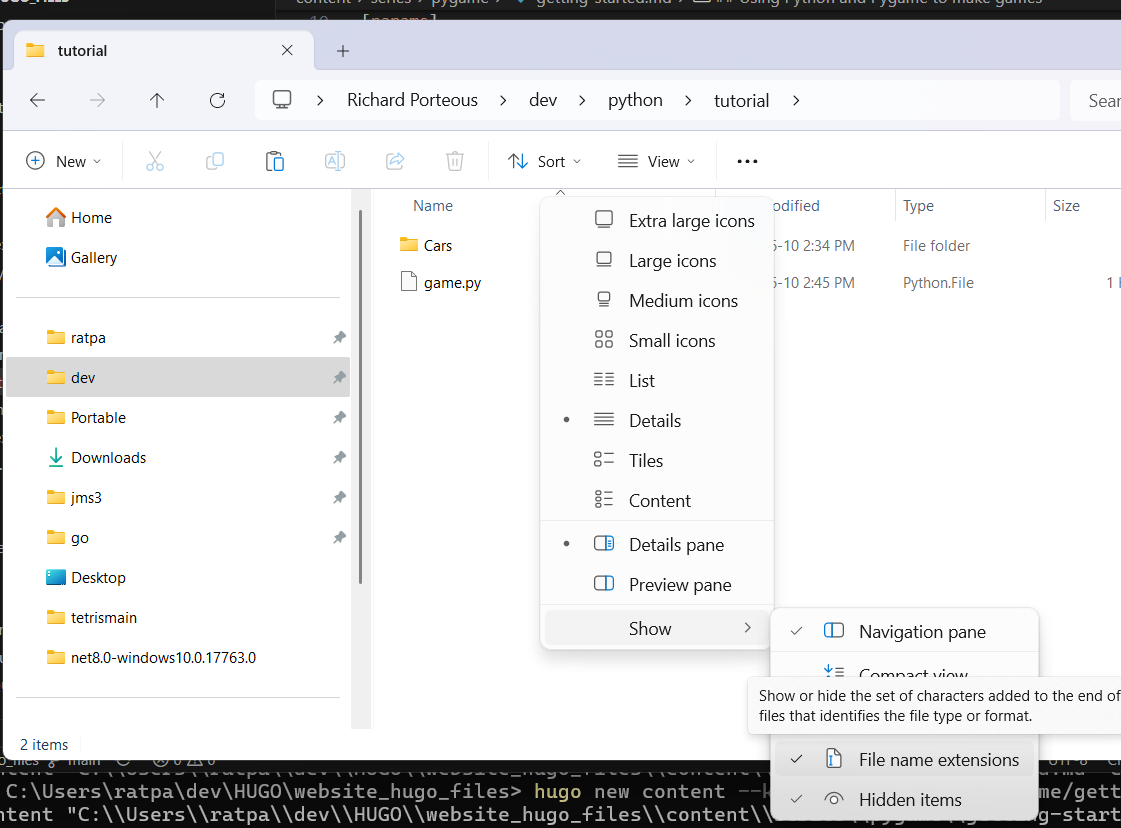
Create a file in that folder and call it game.py. Windows users please enable file name extensions in windows explorer, or it will never work as you will have a name like game.py.txt which won’t work.
-
Using any text editor like Notepad (not WordPad) or an IDE like Visual Studio Code, we can open the file and edit.
From here on we switch between A) Notepad to edit and save our code B) and the terminal to run our code
Editing and running our game
Using Notepad type the following into your game.py file
import pygame
from pygame.locals import *

pygame.init()

# ... home of future code

#

pygame.quit()
and save the file (Ctrl and S keys at the same time)
This imports pygame into the running python game. Initializes it …. and then closes it cleanly.
If we run that it will briefly show us a window before it closes again.
Using the terminal we can run the game by typing
python game.py
Keep the window open until we close it
We now create one of the most important pieces of every game. The game loop.
Between pygame.init() and pygame.quit() we type the following
In python the # is the start of a one line comment
#game loop

running = True

while running:
    for event in pygame.event.get():
        if event.type == QUIT:
            running = False
We created a variable called running. The name running isn’t special, it just reminds us what it used used for. We set it to true.
The “while running” will keep looping until we change the variable running to False.
Everything indented immediately below the while is in the while “block” of code.
Adding in the pygame event allows the game to detects the window-close button “X”, and we set running to false. Setting running to False stops the looping as the while running is no longer True.
The code execution no longer loops over the while block and after completing the loop then drops down to the pygame close code.
Pygame close cleanly closes the pygame library code and we can then exit the game at the end of the file.
Save and run from the terminal as before. You should now get a windows that stays open until we close it.
Set title and background
Our Game needs a title and we would also like a background that looks like grass and not just white (unless you want a snow effect?)
Add this before the game loop
screen = pygame.display.set_mode((800,800))

pygame.display.set_caption("Car Game")

screen.fill((60,220,0))
pygame.display.update()
The code above:
Gets the screen surface are we will draw on and sets it to the size 800 by 800. We save it to a variable we have called “screen” so we can reference it again.
Sets the game title in the window to be Car Game.
Fill the screen surface with a color in RGB format in this case a shade of Green.
And finally update and draw the surface image to the computer display.
What we have done here is create the basic framework for all our games.