Difficulty - easy to medium - assumes basic knowledge of Go
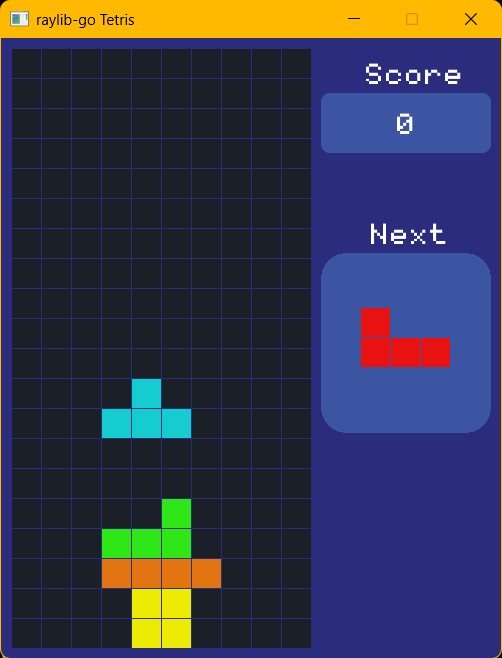
We will end up with a game like this with sound effects and music. I chose this to kick off with as we do not use any images but create our images in the code.
I suggest you use VS-Code, but notepad will work just fine too. Git is recommended.
if using VS-Code install this plugin

Disclaimer
This was the first app I wrote with go and Raylib, and being a complete novice at both Go and Raylib, I decided to convert this c++ tutorial by Nick who explains simply.
You'll recognize the screen immediately as I never made any changes to the look.
What you need
You will need to know about go methods and about go tests
Exercism has a great Go learning track that covers most of Go features including methods. It is a good stating place if you do not know Go very well.
Learn Go with Tests is an online book which covers developing go apps using tests
Get started
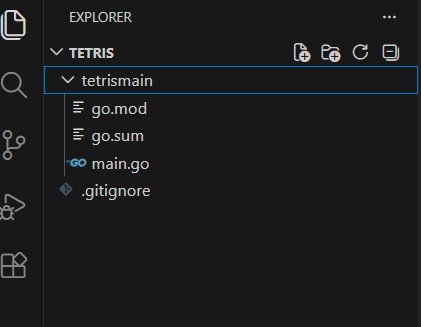
- create a new project like you did before.
- I named the folder 'tetris' and have the project in a sub-folder called tetrismain. (leave the git files in the tetris folder)
- create the folders 'Font' and 'sounds'
add a '.gitignore' to the folder you ran the git init in and add *.exe as the only thing in it (for now). This will prevent 'extra' execution files from being added to our repository.
run the following (git skill practice)
git add .
git commit -m "first commit"
finally change the code
- we want the window size to be 500 by 620 (for mobile) and the description to be "raylib-go Tetris"
- we want a background color (colour) //I use the spelling color to match the spelling often used in code and in the raylib library
- we want the color to be draw on the screen
When drawing on the screen you will notice we just keep draw over everything else. This can be useful when things don't change and optimization is needed. We don't need that kind of optimization for our game.
We 'clear' the screen by drawing a background color then each and everything else in order, each and every frame.
replace the lines that are similar with the code below
rl.InitWindow(500, 620, "raylib-go Tetris")
defer rl.CloseWindow()

//dark blue
backgroundColor := rl.NewColor(44, 44, 127, 255)
and above the DrawText add this
rl.ClearBackground(backgroundColor)
and the remove the DrawText.
If you run (go run .) then you will see a screen roughly the size we want with a blue background.
Now lets draw the grid
We want
- the grid on the left side of the screen
- 10 across and 20 down
- with a gap around and a space between each block in the grid
- a dark color for each empty square
- each square should be a size of 30 by 30
- we need an array to keep track of where the colors will be drawn on the grid
Lets add the following variables above the main func
var NumRows, NumCols, CellSize int
var gridData []int
and initialize above the loop
NumRows = 20
NumCols = 10
CellSize = 30

if len(gridData) == 0 {
    gridData = make([]int, NumRows*NumCols)
}
for i := range gridData {
    gridData[i] = 0
}
printGrid()
Note printGrid is a new function. Functions make things simpler.
from google - Functions are a fundamental building block in code used to organize code, promote reusability, and manage complexity.
printGrid will loop through the grid and print each row on a separate line on the terminal. to do that we will need two additional functions.
- a function to check if we have requested a valid row
- a function that will return a valid row
We can place these three new functions before or after the main function. In Go it doesn't matter what your style is, but if you plan on working with others make sure you know what they expect.
func inGridRow(row int) bool {
    if row >= NumRows || row < 0 {
        return false
    }
    return true
}

func getRowAt(row int) ([]int, error) {

    if !inGridRow(row) {
        return nil, errors.New("row position out of range")
    }
    sStart := row * NumCols
    sEnd := row*NumCols + NumCols
    s := gridData[sStart:sEnd]

    return s, nil
}

func printGrid() {
    for r := 0; r < NumRows; r++ {
        s, _ := getRowAt(r)
        fmt.Println(s)
    }
}
Okay, starting with "inGridRow(row int) bool" when we call this function we pass a row number and we expect it to return a bool. Bools are true or they are false, nothing else. There are 20 rows and our grid counts from 0 to 19 not 1 to 20. This is common for computer languages. So passing in 0 will return true, but 20 will return false. This function checks if the row number is out of range and returns false, otherwise it is true.
"getRowAt(row int) ([]int, error)". We pass in a row number and if it was out of range we get a nil with an error.
if !inGridRow(row) {
    return nil, errors.New("row position out of range")
}
otherwise we slice the row out and return that. to get the row we need to figure out the starting position and the end position of the row, this is done with
sStart := row * NumCols
sEnd := row*NumCols + NumCols
the start position is the row number multiplied by NumCols i.e. 5x10=50 so row 5 starts at 50 and end is 60 ... a slice doesn't include the last number, also common in coding languages. we get a slice of 50 to 59 for row 5, perfect.
The final function is "printGrid()" which doesn't accept anything or return anything. it simply loops through the array getting each slice and then uses fmt.println to print that slice to the terminal.
We will remove printGrid when we are done as it is only there to help us see that the other two functions work as expected. I'll get into testing soon, which is another way.
final code for main today looks like.
package main

import (
    "errors"
    "fmt"

    rl "github.com/gen2brain/raylib-go/raylib"
)

var NumRows, NumCols, CellSize int
var gridData []int

func main() {
    rl.InitWindow(500, 620, "raylib-go Tetris")
    defer rl.CloseWindow()

    //dark blue
    backgroundColor := rl.NewColor(44, 44, 127, 255)

    NumRows = 20
    NumCols = 10
    CellSize = 30

    if len(gridData) == 0 {
        gridData = make([]int, NumRows*NumCols)
    }
    for i := range gridData {
        gridData[i] = 0
    }
    printGrid()

    rl.SetTargetFPS(60)

    for !rl.WindowShouldClose() {
        rl.BeginDrawing()

        rl.ClearBackground(backgroundColor)

        rl.EndDrawing()
    }
}

func inGridRow(row int) bool {
    if row >= NumRows || row < 0 {
        return false
    }
    return true
}

func getRowAt(row int) ([]int, error) {

    if !inGridRow(row) {
        return nil, errors.New("row position out of range")
    }
    sStart := row * NumCols
    sEnd := row*NumCols + NumCols
    s := gridData[sStart:sEnd]

    return s, nil
}

func printGrid() {
    for r := 0; r < NumRows; r++ {
        s, _ := getRowAt(r)
        fmt.Println(s)
    }
}
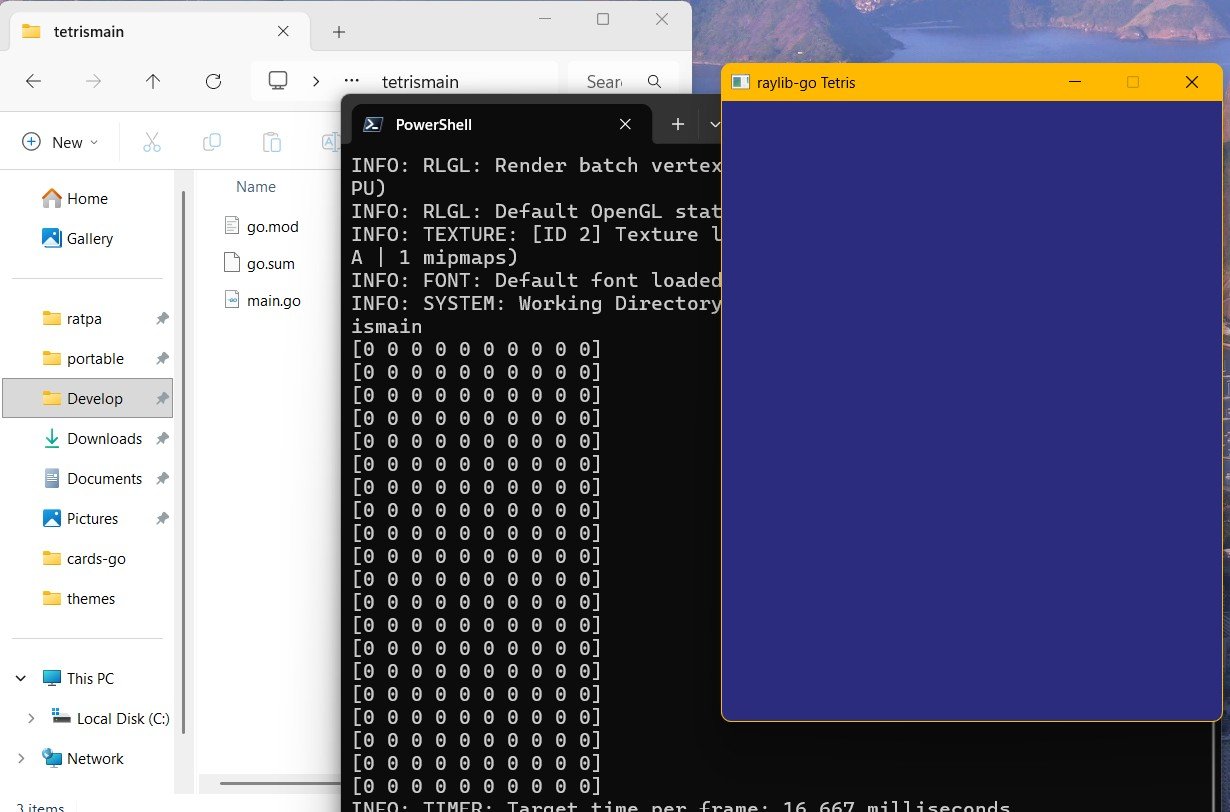
and you should see this when running the code with "go run ."
Next post will be up soon